Deployment Steps
1. Login to AWS Console. Navigate to EC2 → Images → AMI and search with the provided `ami-id.
![](/static/90f4080bce451f2eaa67cb28da4b398f/5877b/AWS%20Cloud%20Monitoring%20Deployment%20Guide.1.07.1.jpg)
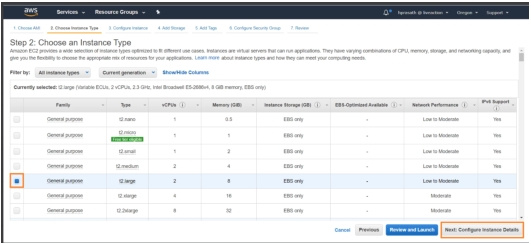
2. Select the instance type and click next.
![](/static/e158d48492b855fe1f453b383bb92c11/5877b/AWS%20Cloud%20Monitoring%20Deployment%20Guide.1.07.2.jpg)
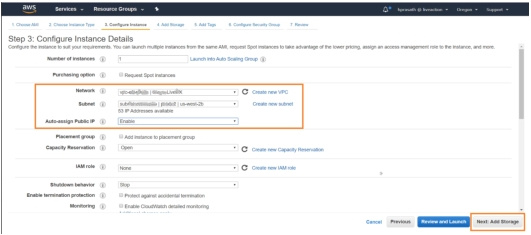
3. Select the VPC, Subnet, Public access and click next.
![](/static/ec038e2505f695c9aab15bd112a2c185/5877b/AWS%20Cloud%20Monitoring%20Deployment%20Guide.1.07.3.jpg)
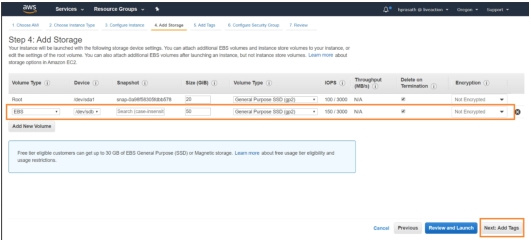
4. Modify the storage limit and Click next.
![](/static/45be31630f278975a750ab54d537ec6e/5877b/AWS%20Cloud%20Monitoring%20Deployment%20Guide.1.07.4.jpg)
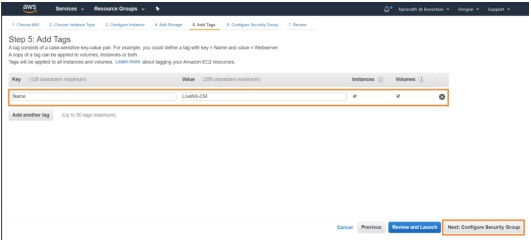
5. Add appropriate tags and Click next.
![](/static/5ff793d7c2c19416cf6fc4a7736468e8/5877b/AWS%20Cloud%20Monitoring%20Deployment%20Guide.1.07.5.jpg)
6. Add the required security group and then click review and launch.
![](/static/8f7695f96e9552f783886b9c14748a0c/5877b/AWS%20Cloud%20Monitoring%20Deployment%20Guide.1.07.6.jpg)
![](/static/3565f326ee615dfb1fbdfec55ab33a91/5877b/AWS%20Cloud%20Monitoring%20Deployment%20Guide.1.07.7.jpg)
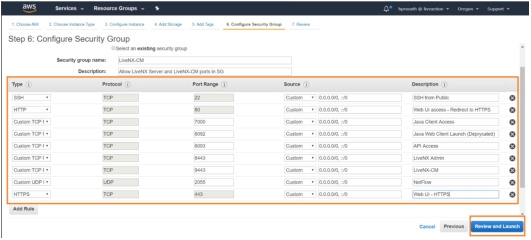
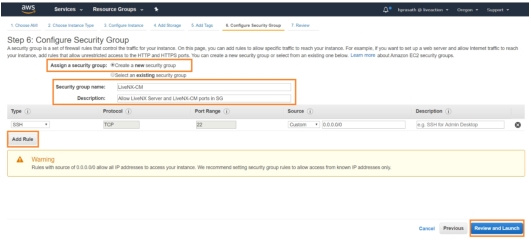
NOTE: In documentation the ports are exposed to open world, harden the security group according to organization policy.
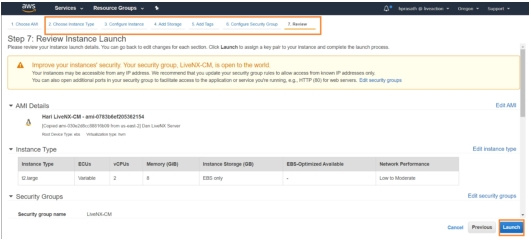
7. Navigate to previous tabs for modifying/Click on Launch.
![](/static/dae5b424ca4eb98353819d182b7fd4e2/5877b/AWS%20Cloud%20Monitoring%20Deployment%20Guide.1.07.8.jpg)
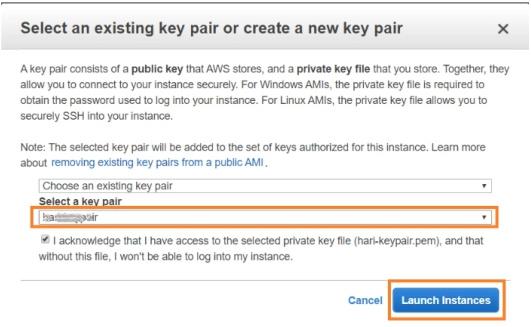
8. Select a key pair/add a new one to launch.
![](/static/a1b8cbd0afd87c4ffb66763e73a26dee/5877b/AWS%20Cloud%20Monitoring%20Deployment%20Guide.1.07.9.jpg)